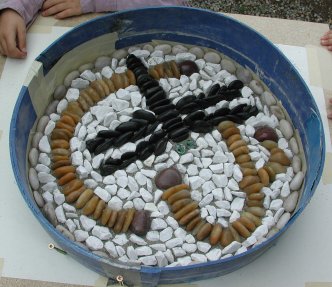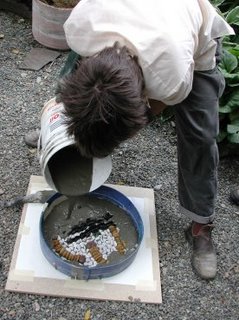
Here’s what ours looked like after we arranged the rocks into a thin bed of sand. It wasn’t as easy as it sounds! The rocks had to be placed just so and the sand had to be the right height around them. Everyone keeps asking what the yellow lines are around my Darth Damselfly and I have to explain they’re like aerial screech marks! DD is doing maneuvers, changing directions, and starting and stopping. Just like me! Glen wanted to know why I chose black for the damselfly and I said because blue or green is just too cute. This damselfly is serious and edgy. She has green broken T-Man beads for eyes, so she's not totally black anyway. This is what it looked like as Glen poured the first layer of expanding grout over the rocks that we’d just spent about 4 hours arranging. The hard part is that we won’t get to see what our stone finally looks like until June 24th. Then we get to put it on the public boulevard at the side of our property, neatly tucked into the grass for people to walk on and admire. Meanwhile it’s hardening and curing in plastic. I hope. We left before we saw whether or not the second layer of concrete got put on it.

Other people, some helped by their kids, were working on their own designs. There was a salmon in a stream with mountains above, made by a long-time friend who is moving away soon. There was a spiral, a snail and a slug watching bicycle wheels go by, a house, a loved cat, and a complex mandala. Dawn is also getting people to work on a stepping game that will be installed in a place where it can be played by neighbourhood kids. This consists of several smaller pieces which include numbers and kid’s footprints with other designs around them. It will be cute when in the future the kids whose footprints are traced in stones will be able to come back and point them out to friends and family. My friend who’s moving soon wants to leave something of herself in the place where she’s lived so long. It’s a great idea.
I found placing the rocks was a lot like beading on my art dolls. Lining up individual elements into a whole shape, fitting rows in between others, using colours that defined the different areas of the design, culling stones that didn’t fit properly or were the wrong shade. We could have spent a lot more time than we did, but my neck was getting sore from standing over the table. And it is possible to get too anal about these things, of course. The rocks were gorgeous though: red, yellow, black, and cream shiny polished ones, plus bluish and grey smooth matte ones and white and green rough ones. I used everything except the blue and green ones. Go figure. We even get to coat them with a sealer afterward to protect them for at least 5 years from the weather.
Now I want to do more of these. I want to have a whole pathway’s worth marching down the boulevard and all over my back yard particularly in the garden. It remains to be seen how far I get on this project though! It’s kind of like so many of my other grand ideas…
But today we’re resting after our labours.
1 comment:
What a wonderful project. i especially like th eperson who is leaving something behind when she moves - a great idea
Post a Comment