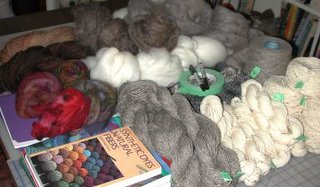
This was the pile of stuff I had all ready for them. This includes examples, books, notes, skeins of yarn, and "nests" of roving, plus tape and pens in case somebody needs to initial their stuff.
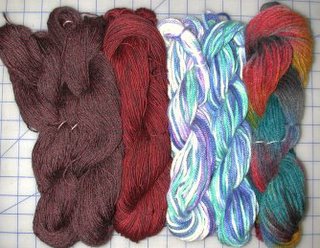
Below are the leftovers, except for some unused roving and a few skeins of yarn. They brought a lot of their own stuff so didn’t use as much of mine as they might have. From left to right: my 2 skeins of Sisu sock yarn that used to be very dark grey and white (4 plies dk/1 ply white) and are now 2 tones of burgundy; 1 skein (actually 1 and a half balls) of Confetti sock yarn that used to be printed grey and white spots with purple, green, and yellow thin stripes and now are dark red from the same dyebath; 2 leftover skeins that were ball-dyed in the microwave, and my pretty colourful painted demo skein that used to be grey. Look in the above picture for the original sock yarns in the middle under the green tape, the undyed balls on the far right, and the grey skeins in the front. They look quite different now, don’t they?
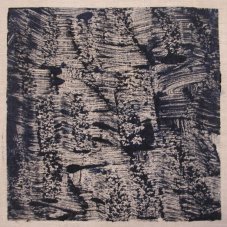
Going back to Saturday, here are a couple of pieces of the monoprinting I did with my Spectrum dye/surface design study group. We used sheets of Plexiglas in several sizes as the printing plates, fabric paint base with added pigments, and whatever fabrics we had hanging around. Besides plain white cotton, I used some pieces that were already dyed with Procion MX or, as in the second piece, one that had been folded and dyed in indigo. I didn’t get very imaginative with the monoprint designs — just trying to get some control of the results without too many variables. The “river” design comes from just adding paint to one piece of plexi and pressing it onto another. When you peel it up again it makes cool patterns on both surfaces. Two prints for the price of one. The other design was made with a loaded sponge brush on the plexi. See, told you it was simple! You can either put the piece of plexi onto the cloth or put the cloth onto the plexi. It’s easier the first way with the little squares and the second way with the big one. I used a brayer (rubber roller with handle) to make sure the fabric was contacting the paint properly. This technique is both easy and difficult at the same time. The concept is basic but making something you actually like is hard. Takes lots of practice and experimenting. Be prepared to add rubber stamping and other embellishment and to cut the good bits out and reassemble into something better. I don’t think I’d want to work on a big intact piece of fabric as it would be too awkward and I’m sure I’d screw it up. It was kind of fun though. Now I have to figure out what’s next in store for the pile of small pieces I’ve made. The group is determined to actually have a finished product each by December instead of just a bunch of samples.

1 comment:
Hi Louisa,
saw your blog in the vgfa newsletter, I have been looking for a like minded individual. As soon as I can figure out how to add you to my friends list I will. This blogging learning curve is certainly forcing me to try new things. Love your photos. I am not sure how to connect in with my blog page to you but I will email it to you. Rosemary
Post a Comment