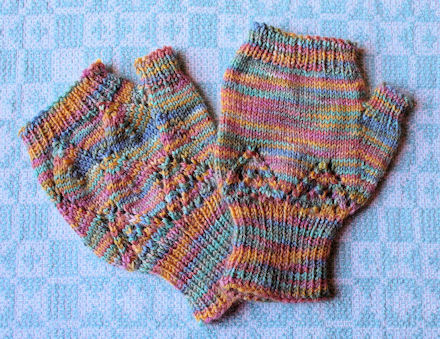
Earthly Fingerless Mitts

For: Me
Begun: December 8, 2008
Finished: December 12, 2008
Yarn: Rabbit Ridge Designs Sock Yarn, 425 yds = 100g, .5 skein “Earth”. Bought on her Alaska tour especially for me by Nana.
Needles: Clover Takumi bamboo dpns, 2 mm
Pattern:
CO 58. Distribute stitches 15/14/15/14 on dpns. K k1/p1 rib for 2”.
For the full mitt chart, it’s on my Ravelry project page here. Follow chart for pattern for right mitt. Red outline indicates thumb gore.
Begin Thumb Gore:
K to 1 st before centre. Increase by knitting in front and back loop of 2 marked centre stitches, complete round following chart.
*K2 rounds without inc.
K to SM, Inc in next stitch, K to within one stitch of next SM, inc in next stitch, k to end of round.*
Repeat from * to * until you have 20 stitches between SMs.
K 1 row.
K to thumb gore. Move stitches between SM to waste thread. CO 2 stitches to fill in gap and complete round.
Knit to end of chart and rib 8 rounds. BO in rib.
Thumb:
Move all thumb gore stitches to dpns.
K around and PU 2 stitches from edge of glove to close hole. K k1/p1 rib for 8 rounds. BO in rib.
Flip palm and back patterns for left mitt.
Comments: I have new respect for pattern designers, particularly those who work with lace patterns! In the process of converting it, I’ve even discovered that there are 2 different versions of Kate Gagnon’s Springtime in Philadelphia pattern, the one I used called Canopy SIP and the regular one (PDF). The Canopy version has the smaller lacey triangles and is less floppy than the Rosies version. I don’t think I would have been interested in knitting the pattern if I’d seen the floppier version first. I need a smaller hat if I’m not going to look drowned in it.
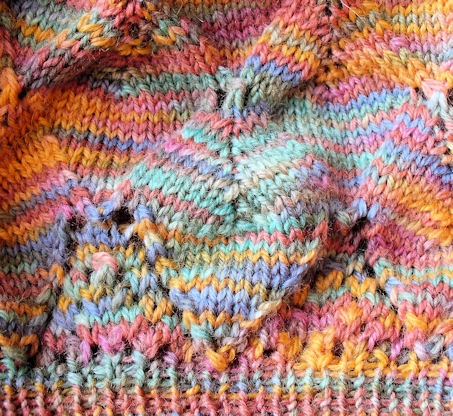
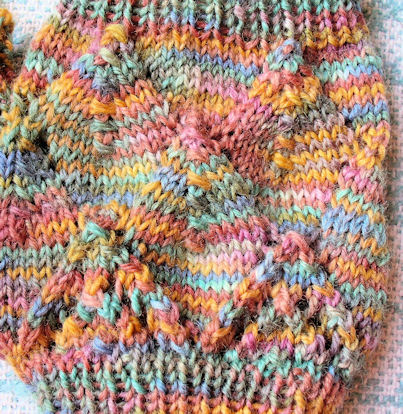
In reversing the direction of the lacey triangles and leaves of the beret pattern for my fingerless mitts, I ran into more than one issue that I hadn’t considered. Look at a close-up of the beret:
And now compare that with a close-up of the mitts:
Can you see where the raised outline is on the bottom of the leaf on the hat and on the lacey triangle on the mitt? I had to move it because of the direction of knitting. Also the leaves have small eyelet holes on the mid-vein and solid edges on the hat and a raised mid-vein and eyelets on the edges on the mitt. The leaves grow from stem to point on the hat: increasing in the mid-vein and decreasing toward the point. On the mitt it’s the reverse: increasing as the tip widens and decreasing on the mid-vein. I could have worked the leaf edges more solid instead with a lifted increase instead of a yarn over, but I like the lighter lacier look on the mitt and it blocks out flatter. I think I achieved a similar look even though the two patterns are not identical. Clear as mud, right?
Here is a portion of each of the two charts so you can compare with the actual knitting:
Note that the hat’s chart seems upside-down because that’s the way it is worked!
I’m not totally happy with these mitts but it’s ok since they are quite functional anyhow. I made a couple of glitches in the knitting too so I was definitely in a hurry to get it done. There’s still a bit of yarn left but not enough for another pair. It may become an edging or something on another project.


2 comments:
I like 'em! :-)
Thanks, hon'! I was actually wearing them on Sunday over my full gloves but I forgot to "show & tell". We were obviously having too much fun, hey?
Post a Comment